Pricing Book
Browse and apply customer-specific pricing books — override catalog prices with custom costs, markups, and validity dates per company.
Written By Victor Raessen
Last updated 2 months ago
The Pricing Book tab lets you browse and manage customer-specific price lists. When a pricing book is assigned to a company, its custom prices automatically apply when creating quotes for that company.
Pricing books require the
pricing-book.managepermission. Navigate to Products > Pricing Book to create and manage pricing books.
What is a pricing book?
A pricing book is a curated list of products with custom pricing that overrides your catalog prices for a specific customer or group of customers.
Each pricing book has:
Name — display name for the book
Special bid number — reference number for distributor special pricing (stored on the book, not per product)
Description — internal notes about the pricing book
Assigned companies — companies that use this pricing book
Assigned classifications — company classification tiers that use this pricing book
Each product entry in the pricing book can have:
Custom price — override the catalog sell price
Custom cost — override the cost price (defaults to current catalog cost if not set)
Valid from / Valid to — date range during which the custom price applies
Note — internal notes about this product's pricing
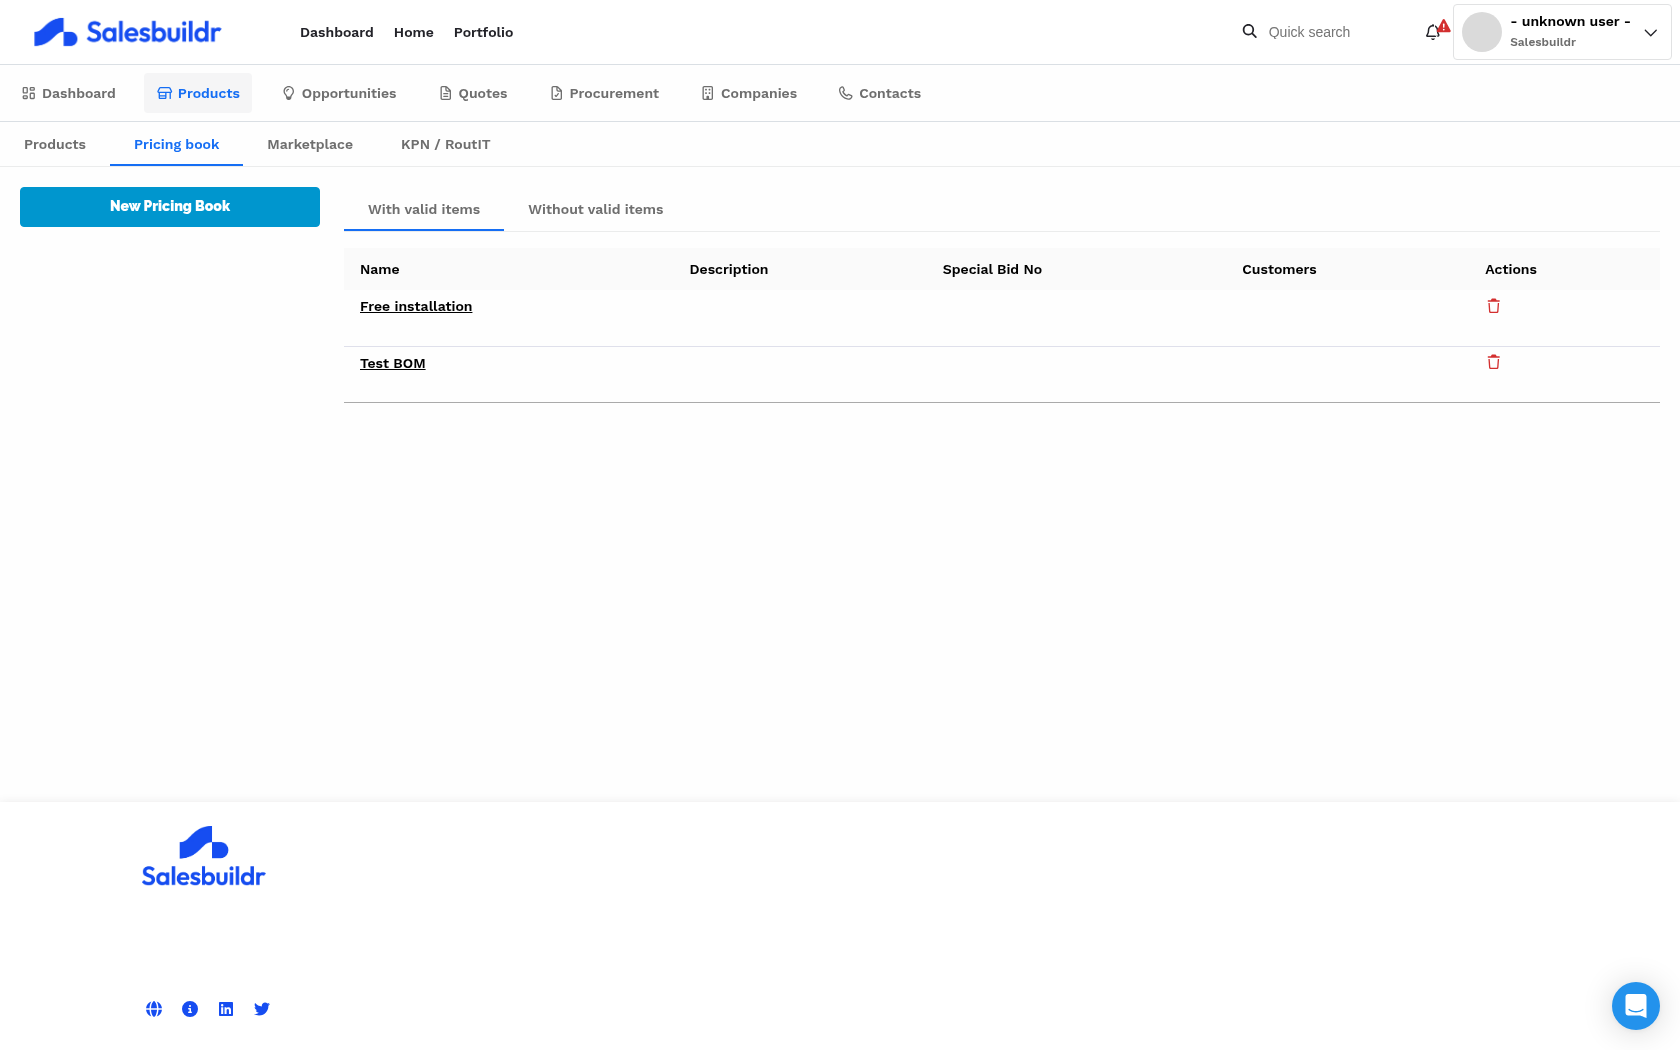
Pricing book list page showing books with name, special bid number, and customer assignments Feb 23, 2026
Browsing pricing books
Navigate to Products > Pricing Book to view all pricing books. The list is split into two tabs: With valid items (books that have products with current validity dates) and Without valid items (books with no currently valid product entries). Select a book to see its product entries and pricing details.
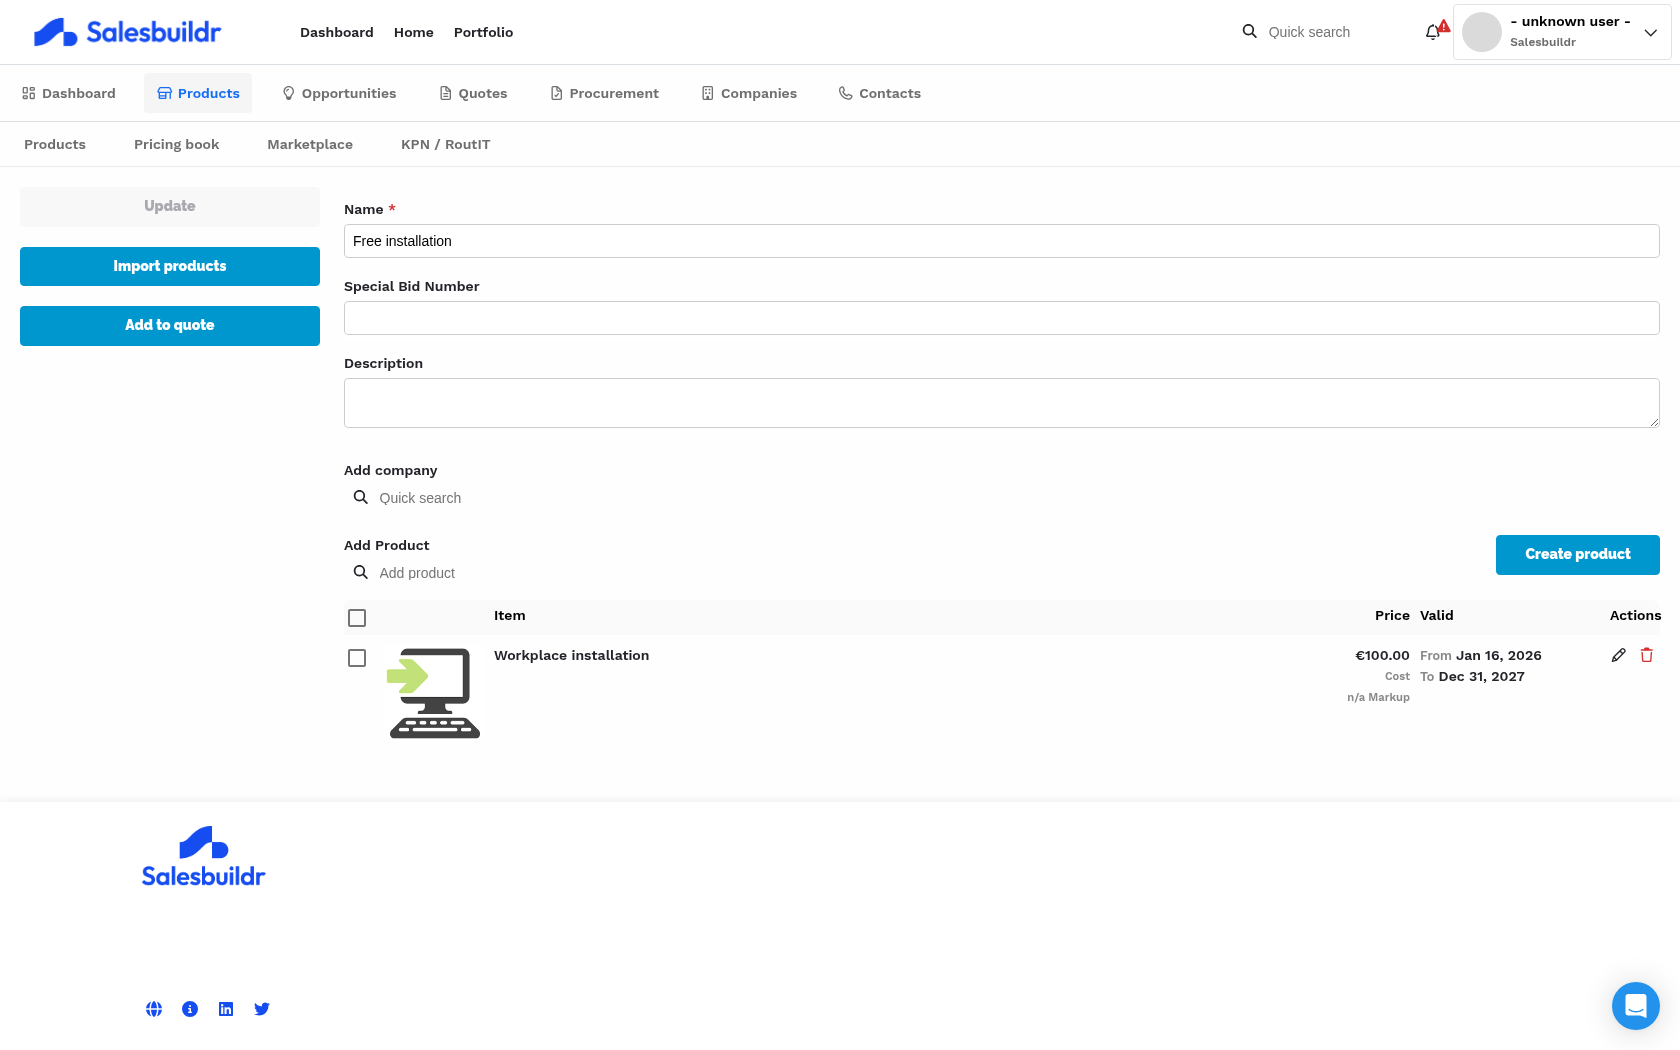
Pricing book detail view showing product entries with custom cost and price overrides, and valid date ranges Feb 23, 2026
Assigning a pricing book to customers
Open a pricing book and use the Add company or classification search to assign it:
Companies — assign the book directly to specific companies
Classifications — assign to a company classification tier (e.g., "Gold partners")
Assigned companies and classifications appear as removable pills. A pricing book can be assigned to multiple companies and classifications.
Applying pricing books to quotes
When you create a quote for a company that has a pricing book assigned, the custom prices apply automatically. You can also apply a pricing book manually from the quote editor using the Apply pricing book action.
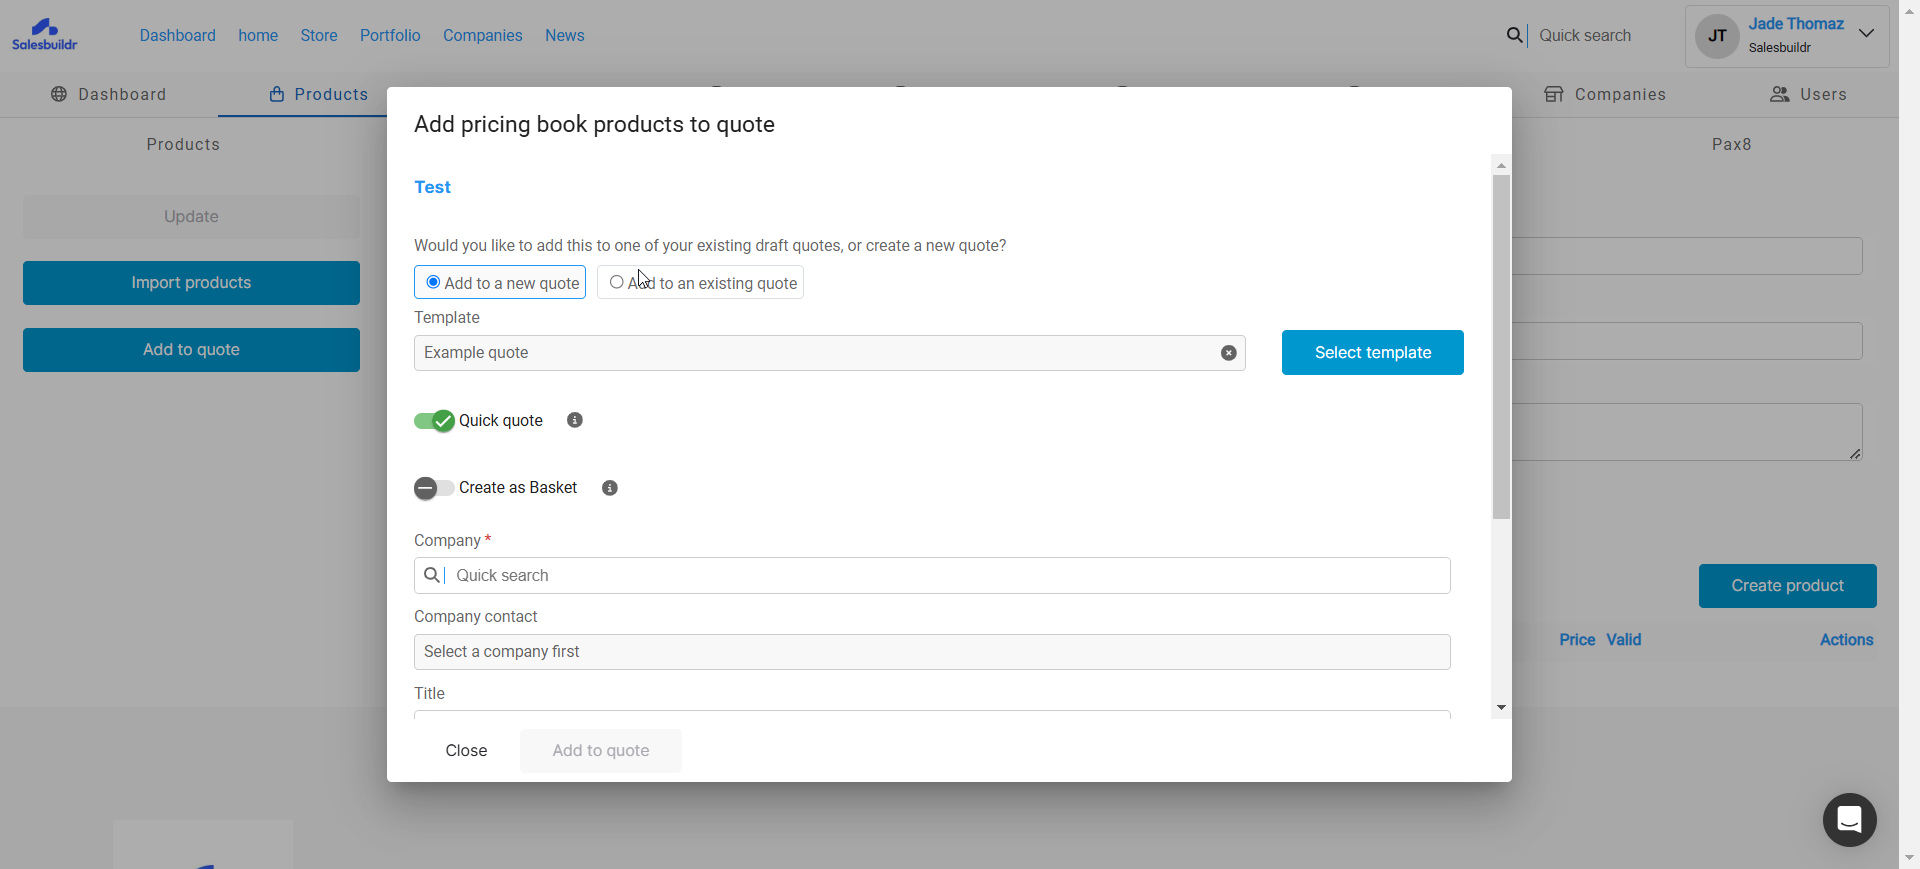
Adding pricing book products to a quote Feb 20, 2026
Pricing books can be imported via CSV — download the template from the pricing book detail page.
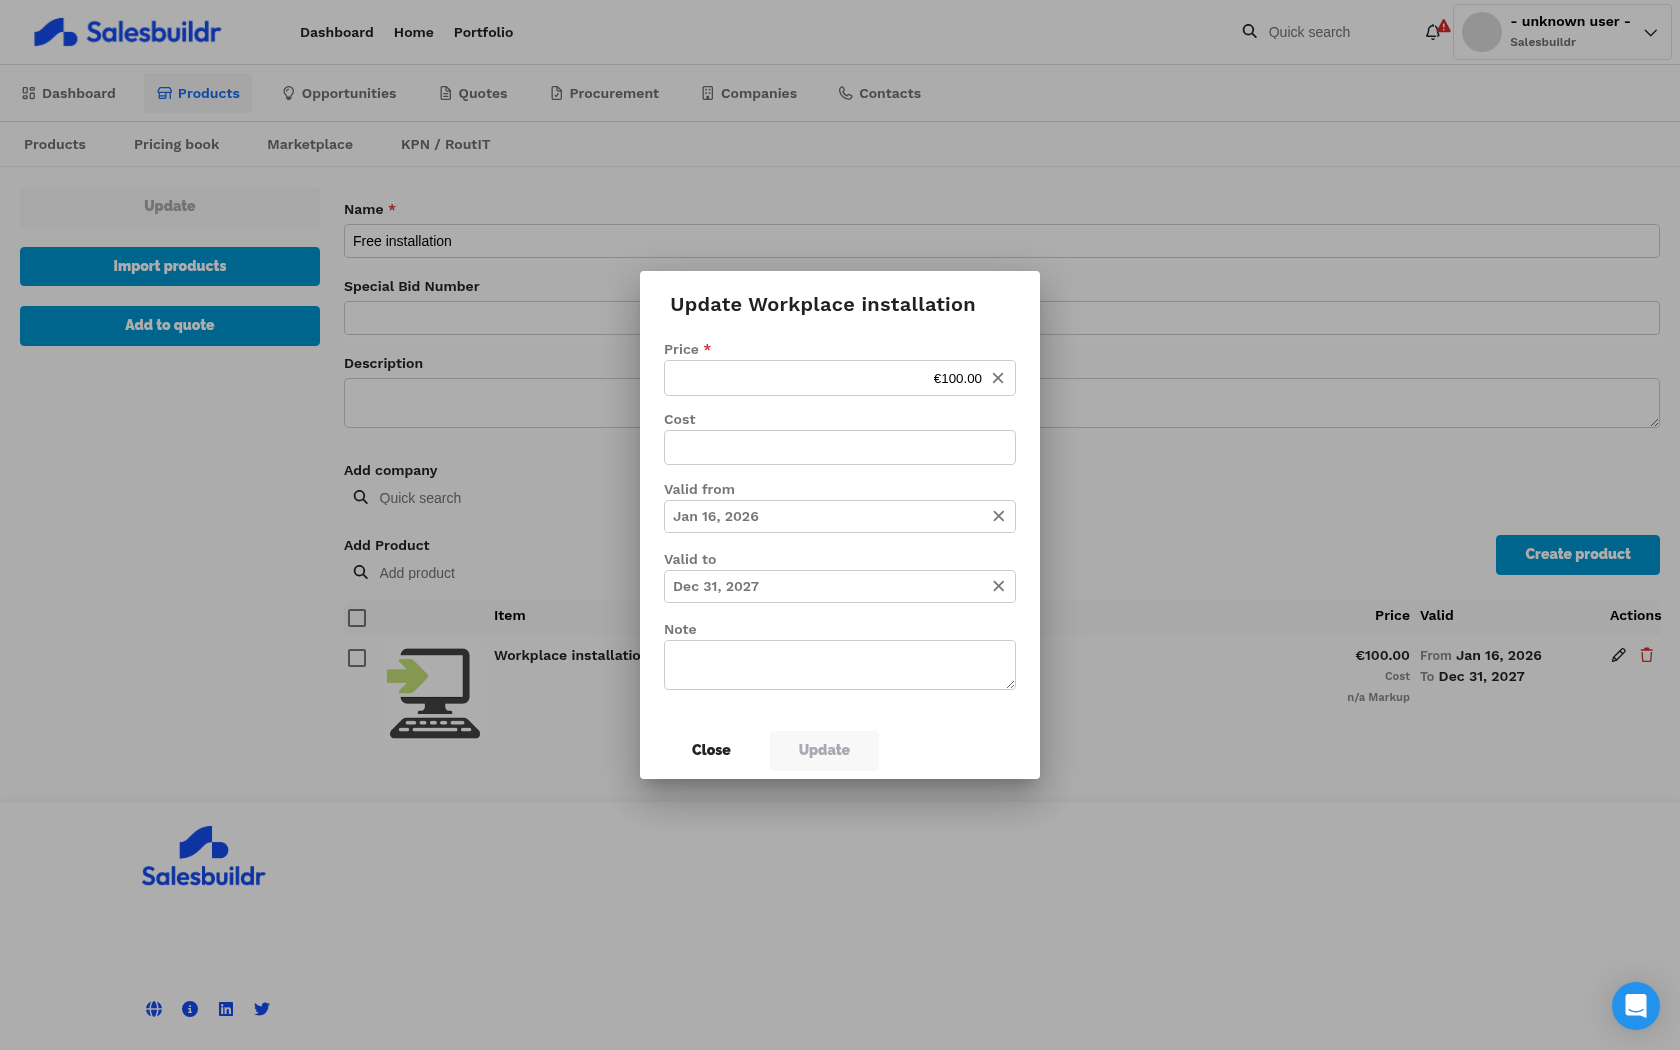
Product pricing dialog showing Price, Cost, Valid from, Valid to, and Note fields for a pricing book entry Feb 23, 2026
Advanced import workflows
Note: Advanced import workflows are part of the Premium plan. Reach out using the chat icon to learn more.
Salesbuildr offers six import workflows to streamline the management of your sales portfolios, supplier relationships, and customer-specific pricing strategies. You can import data from XLS, CSV, or directly from the clipboard.
For best results, use the import template — it contains six tabs with the required columns that auto-match to fields in Salesbuildr.
1. Importing into your catalog
Use this feature to import new or update existing products in your catalog.
Navigate to Products > All Products > Products > Import Products.
Select a CSV, XLS file, or copy and paste a range from a spreadsheet into the importer.
Decide if you want to override existing data based on the MPN (Manufacturer Part Number) field, then click Next.
Select the region to indicate the date and number formatting, then map the fields from the source file to their corresponding fields in Salesbuildr.
Map the categories from the source file to those in Salesbuildr — mapping occurs automatically if category names match.
Map the units from the source file to Salesbuildr — automatic mapping occurs if unit names match.
Map the unit terms from the source file to the corresponding units in Salesbuildr — automatic mapping occurs if unit terms match.
Map the manufacturers from the source file — automatic mapping occurs for matching names.
Salesbuildr will provide a preview of the first five rows for confirmation. When satisfied, click Import.
Post-import, Salesbuildr will attempt to fetch product specifications and images based on the provided MPN. View your imported data to confirm everything is correct.
Once imported, you have the option to select all products for immediate addition to a quote.
2. Importing into a customer pricing book
Use this feature to import new or update existing products in a customer-specific pricing book. This is ideal for tenders and special bids that have a specific date range.
Go to Products > All Products > Pricing Book > New Pricing Book, fill in the required fields, and click Save.
Click Import products. You can select a CSV, XLS file, or copy and paste a range from a spreadsheet into the importer.
Decide if you want to override existing data based on the MPN field, then click Next.
Select the region to indicate the date and number formatting, then map the fields from the source file to their corresponding fields in Salesbuildr.
Map the categories from the source file to those in Salesbuildr — mapping occurs automatically if category names match.
Map the units from the source file to Salesbuildr — automatic mapping occurs if unit names match.
Map the unit terms from the source file to the corresponding units in Salesbuildr — automatic mapping occurs if unit terms match.
Map the manufacturers from the source file — automatic mapping occurs for matching names.
Salesbuildr will provide a preview of the first five rows for confirmation. When satisfied, click Import.
Once the import is complete, click Close to view the results.
3. Importing into a customer proposal
Create a new proposal and select Import Products on the right menu. You can select a CSV, XLS file, or copy and paste a range from a spreadsheet into the importer.
Decide if you want to override existing data based on the MPN field, then click Next.
Choose the region to indicate the date and number notation format, then map the fields from the source file to their corresponding fields in Salesbuildr.
Map the categories from the source file to the corresponding categories in Salesbuildr.
Map the units from the source file to Salesbuildr — automatic mapping occurs if unit names match.
Map the unit terms from the source file to the corresponding units in Salesbuildr — automatic mapping occurs if unit terms match.
Map the manufacturers from the source file — automatic mapping occurs for matching names.
Salesbuildr will provide a preview of the first five rows for confirmation. When satisfied, click Import.
Once the import is complete, click Close. The end result is a customer-specific proposal with all line items neatly ordered by product category.
4. Importing products with a bill of materials into a customer proposal
Use this workflow when selling special products or built-to-order items. Your source file should list the components that make up the bill of materials on row B.
Create a new bill of materials and select Import Products on the right menu. You can select a CSV, XLS file, or copy and paste a range from a spreadsheet into the importer.
Decide if you want to override existing data based on the MPN field, then click Next.
Choose the region to indicate the date and number notation format, then map the fields from the source file to their corresponding fields in Salesbuildr.
Scroll down and toggle 'Bill of materials - will be added as description for the product row above' to ON. Fill out the fields below, then click Next.
Map the categories from the source file to the corresponding categories in Salesbuildr.
Map the units from the source file to Salesbuildr — automatic mapping occurs if unit names match.
Map the unit terms from the source file to the corresponding units in Salesbuildr — automatic mapping occurs if unit terms match.
Map the manufacturers from the source file — automatic mapping occurs for matching names.
Salesbuildr will provide a preview of the first five rows for confirmation. When satisfied, click Import.
Once the import is complete, click Close.
On the quote, click Bill of materials settings.
In the pop-up window, choose whether to show the product bill of materials or not, then click Update.
5. Importing Autotask labour into a customer proposal
Use the labour bundle.xlsx template for this import. On the quote editor, use the Import labour option and select the filled-in template. Labour line items will be rolled up per category.
Create a new proposal and select Import Products on the right menu. You can select a CSV, XLS file, or copy and paste a range from a spreadsheet into the importer.
Decide if you want to override existing data based on the MPN field, then click Next.
Make sure to reference the correct Autotask labour ID to ensure the correct role gets imported.
Choose the region to indicate the date and number notation format, then map the fields from the source file to their corresponding fields in Salesbuildr.
6. Importing license renewals
This workflow enables you to bulk create license renewal proposals for multiple customers at once.
Navigate to the Quotes tab and select Import licensing renewals.
Import or paste the data from your template that contains the correct information.
Make sure the customer ID field contains your customer ID. You can either manually set the customer ID in Salesbuildr or use the internal Autotask ID for your customer.
Choose the region to indicate the date and number notation format, then map the fields from the source file to their corresponding fields in Salesbuildr.
Map the categories from the source file to the corresponding categories in Salesbuildr.
Map the units from the source file to Salesbuildr — automatic mapping occurs if unit names match.
Select the product distributor, template, and date format, then click Import.
Once the import is complete, click Close.
This workflow will automatically:
Create an opportunity and quote for each customer with the specified line items. The title of the quote will match the value of column J in the template.
Import the line items into your sales portfolio based on the manufacturer part number.
See also
Dynamic Pricing — Products
Companies — Companies
Products — Products
Quote Editor — Quotes
Bundling — Products
Advanced Import Workflows — Products