Email settings, sender domain authentication (SPF, DKIM, and DMARC alignment), dynamic email signatures with creator variables, and notification templates.
Written By Victor Raessen
Last updated 19 days ago
Messaging
Salesbuildr sends automated emails when quotes are delivered, approved, declined, or when customers are invited to log in. All templates are fully customizable with merge fields. You can also send marketing emails directly to contacts.
Email settings
The Settings tab configures the default email addresses used when sending emails from Salesbuildr.
Default 'from' address — The sender address shown on outgoing emails (e.g.,
demo-victor@salesbuildr.com)Use site's default from address — When enabled, quote notification emails use the default from address above instead of the quote owner's address
Default BCC to — Email addresses that are always BCC'd on all outgoing platform emails (press Enter after each address)
Default recipient for leads — Where lead notifications are sent
Admin contacts — Company contacts who receive admin-level notifications
Note: The Default 'from' address field accepts only a single value. You cannot configure multiple default sender addresses here — all outgoing emails use the one address defined on this tab.
Click Send test email to verify your configuration.
Settings > Email > Settings — Mar 1, 2026
Domain names
The Domain Names tab manages the email sending domains for your Salesbuildr instance. Adding and verifying a custom domain improves email deliverability and prevents outgoing emails from being flagged as spam.
The exact DNS records to add are generated for your domain and shown in the product. There is no static list in this article — hostnames are unique to each domain.
Add a sending domain
- Go to Settings > Email > Domain Names.
- Click Create New.
- In the Add domain name dialog, enter the domain you send from (for example
yourcompany.com) and click Add. - Expand the new domain. Copy each Hostname and Value from the table and create matching records at your DNS provider.
- After the records have propagated, click Validate.
If you have not added a domain yet, the tab reads No domain names added yet.
Each domain shows a green check when it is valid, or a red cross when it is not. A domain must validate before you can use it as a Default 'from' address on the Settings tab — saving an address on an unvalidated domain fails with Domain name is not validated.
Settings > Email > Domain Names — Mar 1, 2026
Why Salesbuildr requires an SPF record
SPF (Sender Policy Framework) tells receiving mail servers which senders are allowed to deliver mail for your domain.
Salesbuildr sends quote emails, approval requests, invitations, and other notifications on your behalf. Those messages use your domain in the From address, but they leave through Salesbuildr's email provider — not your own mail server. Without SPF and DKIM (DomainKeys Identified Mail), receiving servers treat that as spoofing and send the message to spam or reject it.
The records look like DKIM CNAMEs — that is expected
Salesbuildr uses SendGrid's automatic security mode. In that mode, SPF is not a traditional v=spf1 TXT record on your root domain. SendGrid asks you to add CNAME records instead:
All three rows are type CNAME, and two are named dkim1 and dkim2, so the table can look like DKIM-only records. The mail_cname row is the SPF path. Do not add a separate v=spf1 include:sendgrid.net TXT record for Salesbuildr on your root domain — that is the non-automatic setup and is not what Salesbuildr shows.
You do not need to change an existing SPF TXT record you already use for Microsoft 365, Google Workspace, or another mail system. Automatic security keeps Salesbuildr's SPF on the delegated subdomain, so it does not replace your root-domain SPF.
Each row has copy menus:
- Hostname — Copy subdomain or Copy full domain
- Value — Copy value or Copy value with trailing dot
Some DNS providers need the trailing dot; others reject or strip it. The product hint reads: Check with your DNS provider if the trailing dot is needed!
DNS changes often take a few minutes and can take up to 48 hours. If Validate returns SendGrid API is not ready to validated this domain name. Please try again later., wait and try again — the records may already be correct. If a row shows a CNAME mismatch, compare the hostname and value with what you pasted.
Why recipients see "unauthenticated sender" or "unverified sender"
Some email clients (for example Zoho Mail) show a warning such as unauthenticated sender or unverified sender even when the message is genuine and both SPF and DKIM pass.
That warning is expected for mail Salesbuildr sends on your behalf. It does not mean the domain is misconfigured, the message is spoofed, or something in Salesbuildr is broken.
Receiving servers run two related checks:
- Did the message authenticate? SPF asks whether this server is allowed to send mail for the bounce address. DKIM asks whether the digital signature is valid. After the three CNAME records on Settings > Email > Domain Names validate, both of those checks should pass.
- Does the authenticated domain match the From address the recipient sees? That match is called DMARC alignment. Some clients treat a mismatch — or the absence of a DMARC policy — as an unverified sender, even though SPF and DKIM themselves passed.
In plain language: pass means "this mail server is allowed to send this message." Align means "the domain that was allowed to send matches the name in From." Those are different questions, and a client can answer "yes" to the first and still show a warning about the second.
Why the bounce address looks different from From
Every email has two sender addresses:
From — what the recipient sees (for example
quotes@yourcompany.com). This is the address you set in Settings > Email > Settings.Return-path / mail-from — the bounce address used if the message cannot be delivered. Salesbuildr's email provider uses a dedicated bounce subdomain of your sending domain, such as
em9954.yourcompany.com. That hostname is the mail_cname row on Settings > Email > Domain Names.
The bounce subdomain exists so delivery failures go back to Salesbuildr's email provider instead of mixing with your everyday inbox. You delegated that subdomain when you added the mail_cname CNAME. Seeing a hostname like em9954.yourcompany.com in the message headers is the normal result of delegated sending — not a hijacked or spoofed sender.
SPF is checked against that bounce subdomain, not against the From address. That is why SPF can pass while a client still notes that the bounce hostname and the From hostname are not identical.
DMARC is optional
DMARC (Domain-based Message Authentication, Reporting and Conformance) is a policy you publish yourself at your DNS provider. It tells receiving servers what to do when alignment fails. Salesbuildr does not show a DMARC record and does not require one to validate a sending domain.
You do not need to add DMARC to make Salesbuildr send mail, and you do not need to add it to "fix" the warning above. If your security team wants a DMARC policy anyway:
- Finish the three CNAME records and click Validate first. DMARC only works after SPF and DKIM are in place.
- Add a TXT record at
_dmarc.yourcompany.comat your DNS provider. - Start in monitoring mode — a policy of
p=none— so you receive reports without changing how recipients deliver the mail. Do not jump top=quarantineorp=rejectuntil you have reviewed those reports and confirmed alignment for every system that sends as your domain, not only Salesbuildr.
If emails are blocked or go to spam (not just a warning banner), see Email & Notifications for outbound IP allowlisting.
Email signatures
Email signatures are added to outgoing quote emails. You create them once for the workspace — they are not a separate signature per user. To personalise the block for the rep on each quote, insert creator variables. When the email is sent, Salesbuildr replaces those fields with that quote creator's name, email, phone, and signature image.
You need admin access to create or edit signatures. Any user can pick an existing signature when they send a quote.
A short walkthrough:
Create a signature
- Go to Settings > Email > Signature.
- Click New Email Signature.
- Enter a Name — a label for your team (for example
Default quote signature). Customers do not see this name. - Optionally turn on Default signature. Only one signature can be the default. When you save a new default, Salesbuildr clears the flag on the previous one. The list marks the default with a star.
- Add a Header if you want branded content above the quote email body. Leave it empty to use the system default.
- Add a Footer — this is the signature block customers see under the email.
- Expand Available template variables under the editors.
- Browse to the quote creator fields, click the copy icon next to each one you need, then paste into the footer (or header). Salesbuildr confirms the copy and puts the field on your clipboard with the correct
{{variable}}syntax. - Click Save.
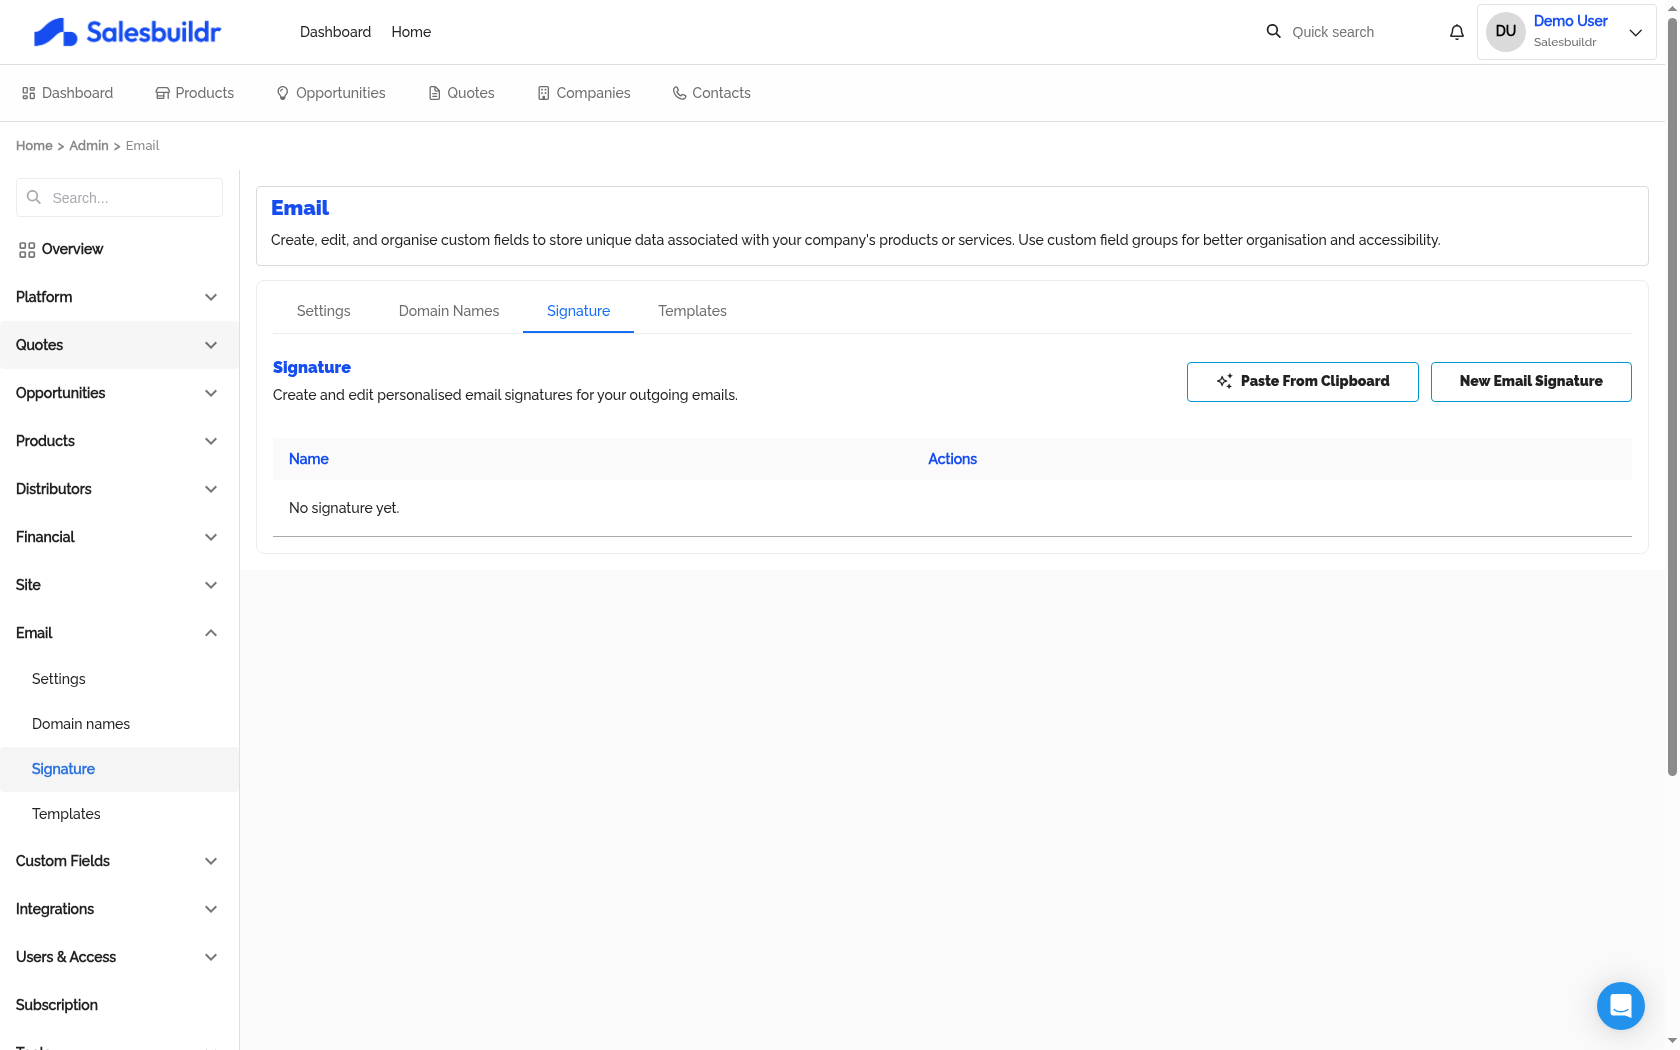
Settings > Email > Signature — Mar 1, 2026
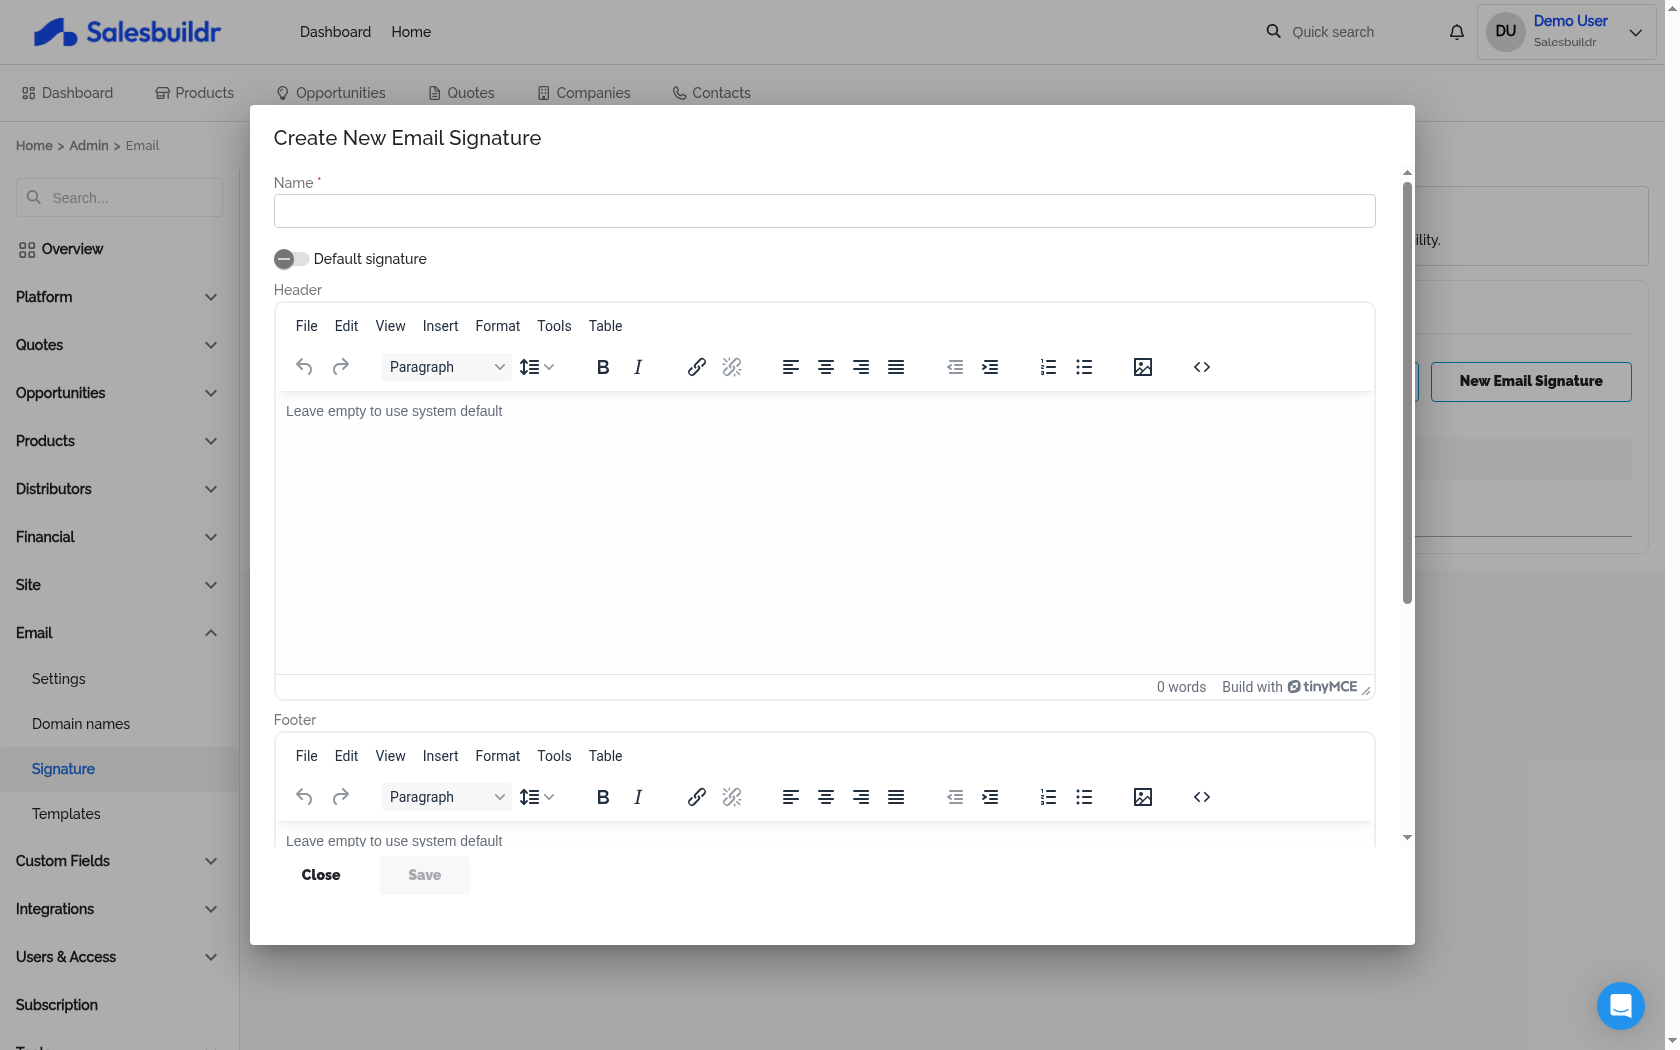
Settings > Email > Signature > New — Mar 1, 2026
You can create more than one signature (for example formal vs informal). When someone sends a quote, the send dialog Email signature list is pre-selected to the default. They can choose a different one before they confirm.
Tip: Avoid duplicating information that's already in your outgoing email template. If your email template includes your name and company, the signature should complement it — not repeat it.
Personalise the signature for the quote creator
Copy fields from Available template variables. Do not type them from memory — a misspelled or shortened name stays as raw text in the sent email.
In an email signature, creator fields sit under quote, and the name field is fullName (not name):
A typical footer looks like this:
{{quote.creator.fullName}}{{quote.creator.role}}{{quote.creator.email}} | {{quote.creator.phone}}{{image quote.creator.signature width=160 height=160}}Those values come from the quote creator's contact profile (name, email, phone, Role, and the Signature image). Each rep sets their own image from their avatar menu → Manage your profile → Signature. If a field is empty on the profile, that line is blank in the email.
Creator is the person who created the quote. If a teammate later sends that quote, the creator fields still show the original author. To show the person who clicks Send, use the user fields ({{user.fullName}}, {{user.email}}, {{user.phone}}). To show the opportunity owner, use the quote owner fields ({{quote.owner.fullName}}, and the image snippet for quote.owner.signature).
Quote body widgets and cover pages use a shorter path for the same person — {{creator.fullName}}, {{creator.email}}, {{creator.phone}}, and the image snippet for creator.signature. Those shorter names do not fill in on an email signature. See HTML content, variables, languages, and starter templates for the copy-and-paste workflow on quotes.
Check the result
Send test email on the Settings tab sends the header and footer as written. It does not fill creator or quote fields, so you may still see {{quote.creator.fullName}} in that test. To confirm personalisation, send a real quote (or a draft to yourself) and open the delivered message.
If the sent email shows the curly-brace text instead of a name:
- Confirm the field matches the table above —
{{quote.creator.fullName}}, not{{creator.name}}or{{creator.fullName}}. - Use double curly braces with no extra characters:
{{quote.creator.email}}. - Copy from Available template variables instead of editing the token by hand.
AI-generated signatures
Paste From Clipboard on the Signature tab reads an existing signature from your clipboard and opens it as a new signature. If OpenAI is enabled for your account, Salesbuildr reformats the HTML first; otherwise the pasted HTML is used as-is. Review the result and still replace hardcoded names with the creator fields above if you want the block to follow each quote's author.
Email templates
Salesbuildr sends emails at various points in the quote lifecycle. Each email type has a default template that you can customize.
Built-in email categories
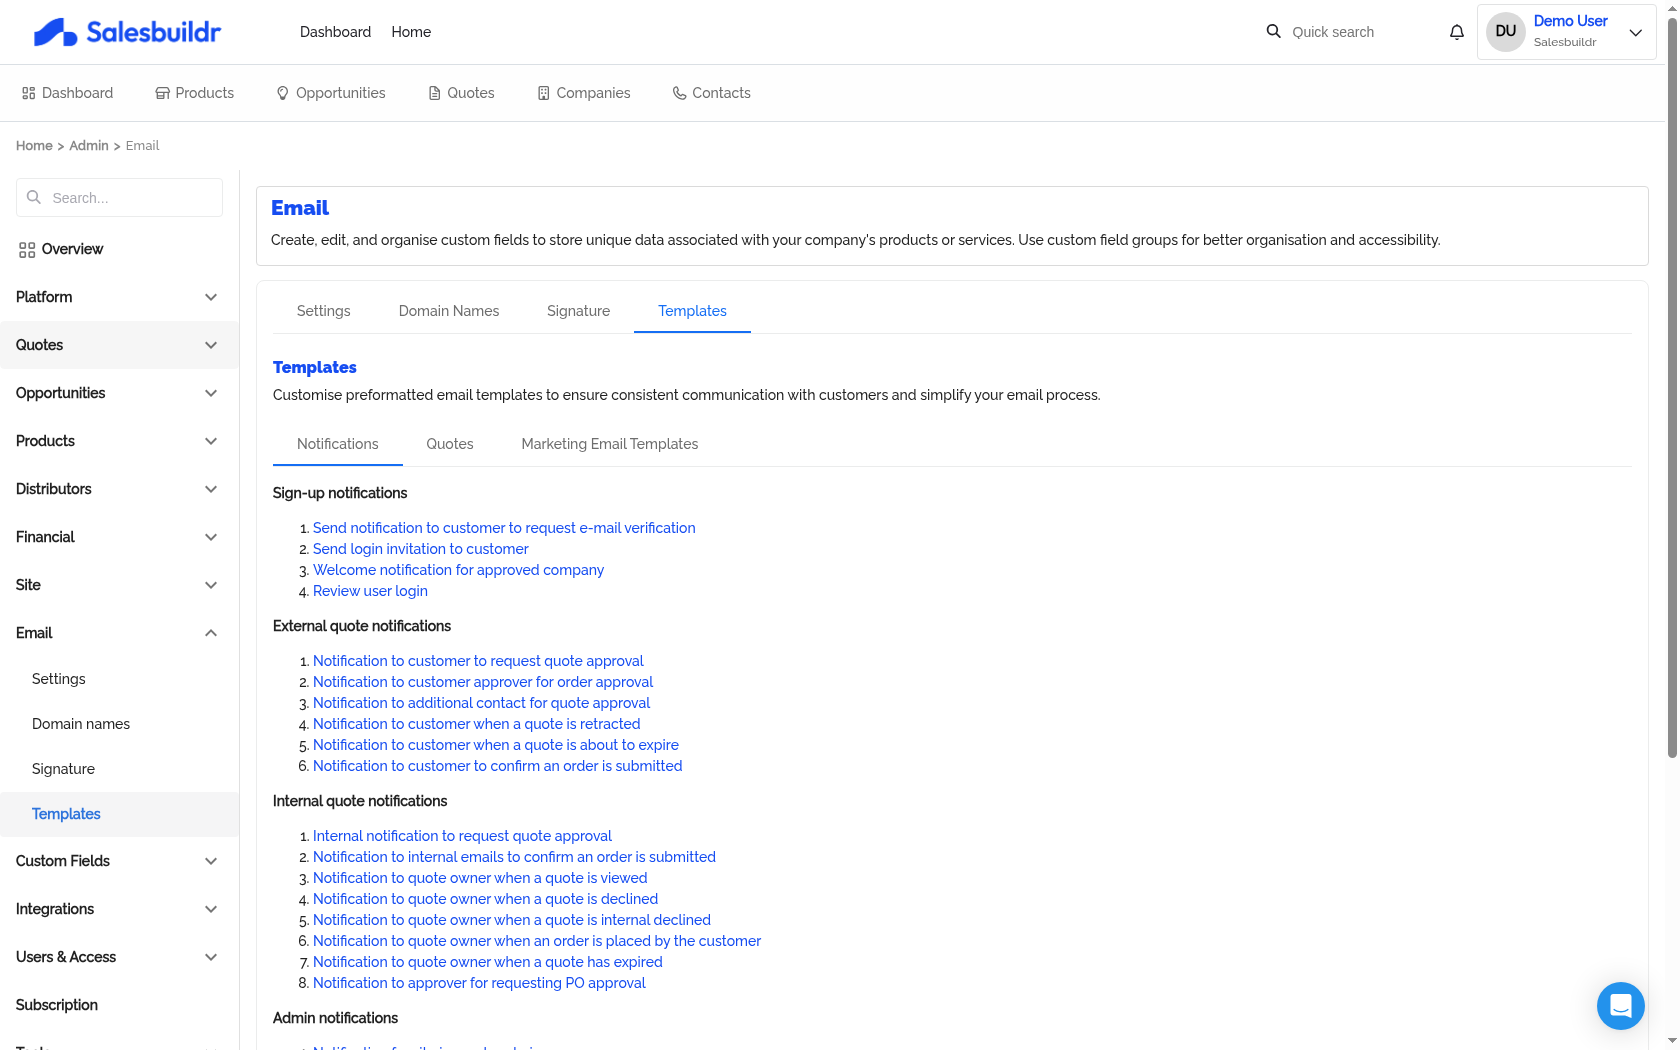
Settings > Email > Templates > Notifications — Mar 1, 2026
Customizing email templates
Navigate to Settings > Email > Templates to edit built-in templates. Each template has:
Subject — Supports merge fields (e.g.,
{{quote.name}})Body — Rich text HTML with merge fields
CC / BCC — Additional recipients
Attach PDF — Toggle to include a PDF version of the quote
Localization — Translate subject and body per language
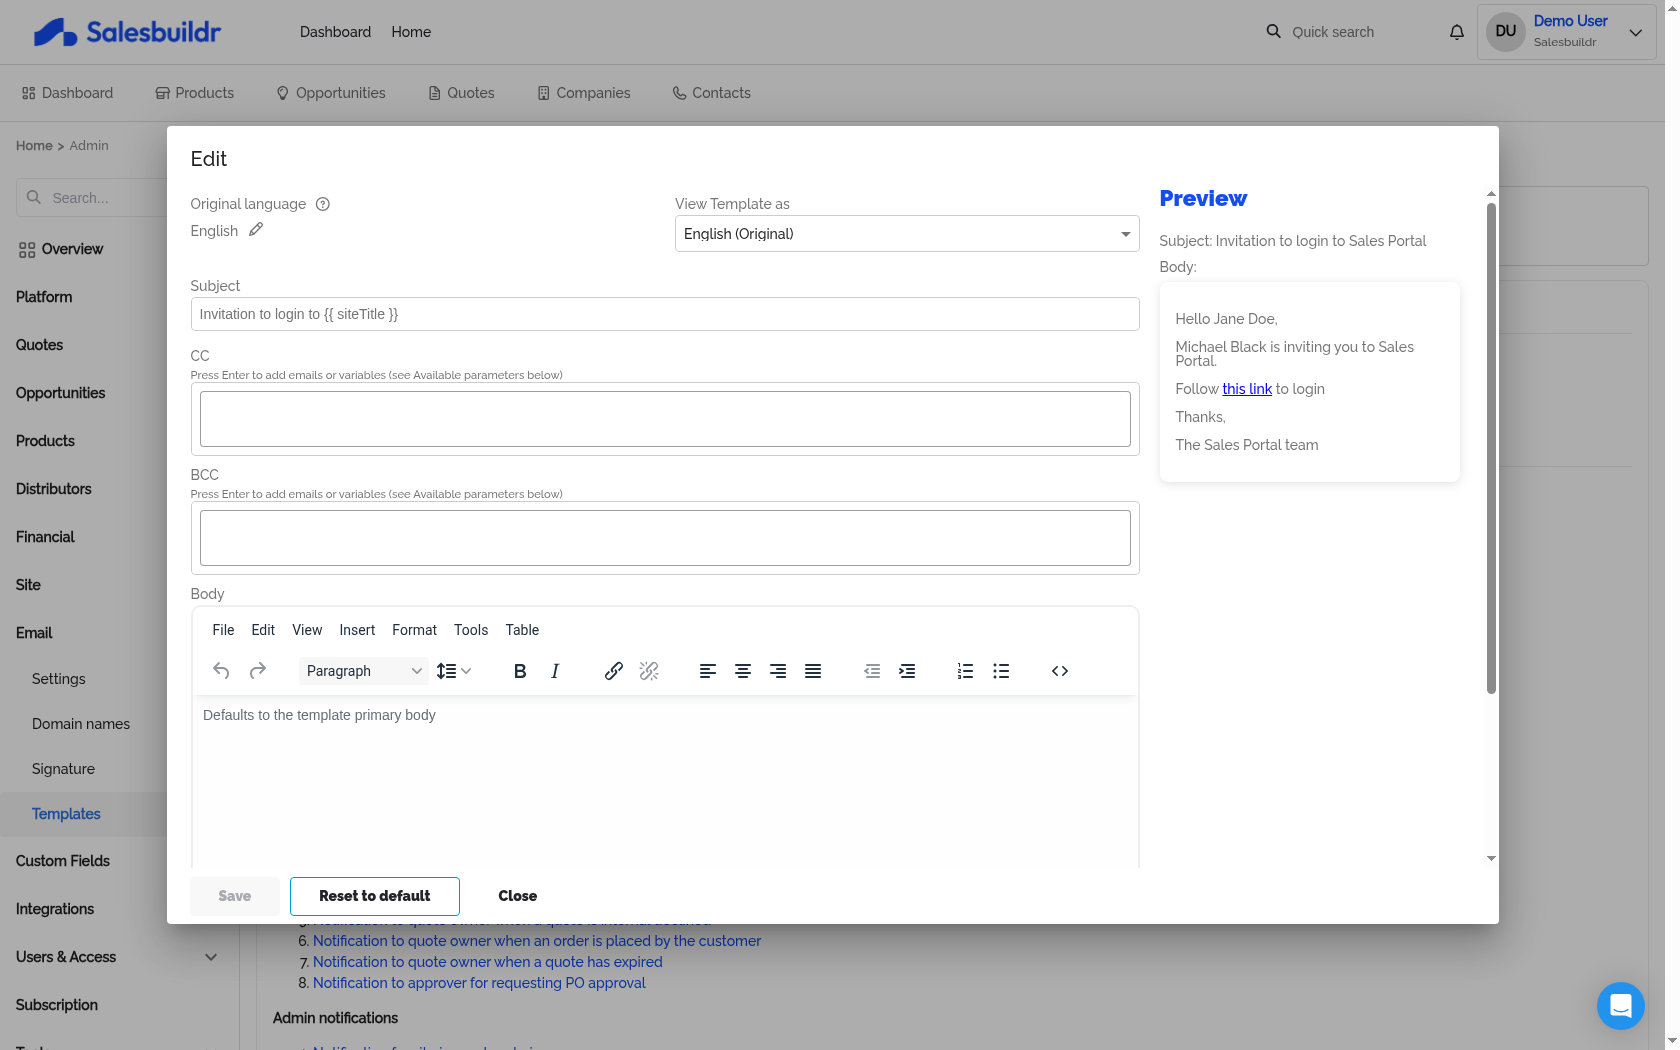
Settings > Email > Templates > Edit template — Mar 1, 2026
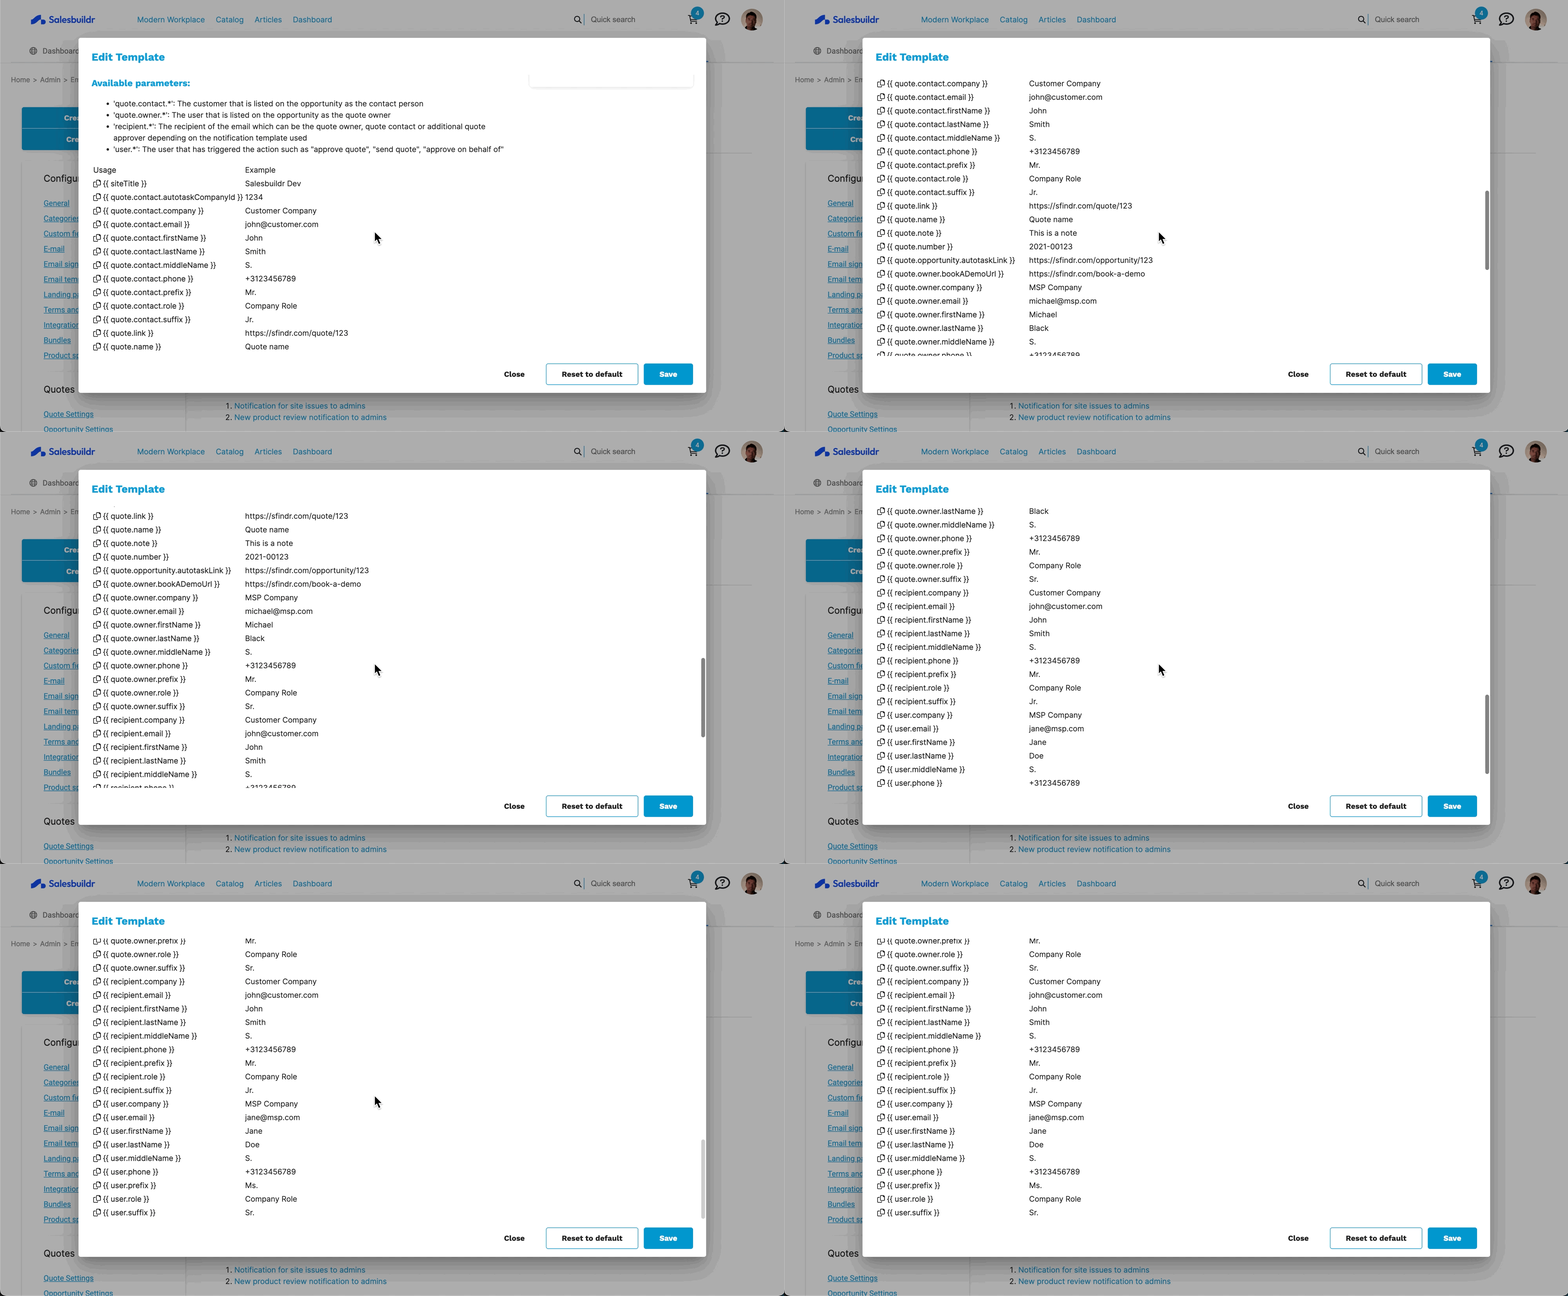
Available template parameters with variable names and example values Feb 20, 2026
Custom email templates
You can create custom email templates for two purposes:
Custom approval emails — Override the default approval notification with a branded email
Marketing emails — Create promotional or informational email templates to send to contacts (see Snippets)
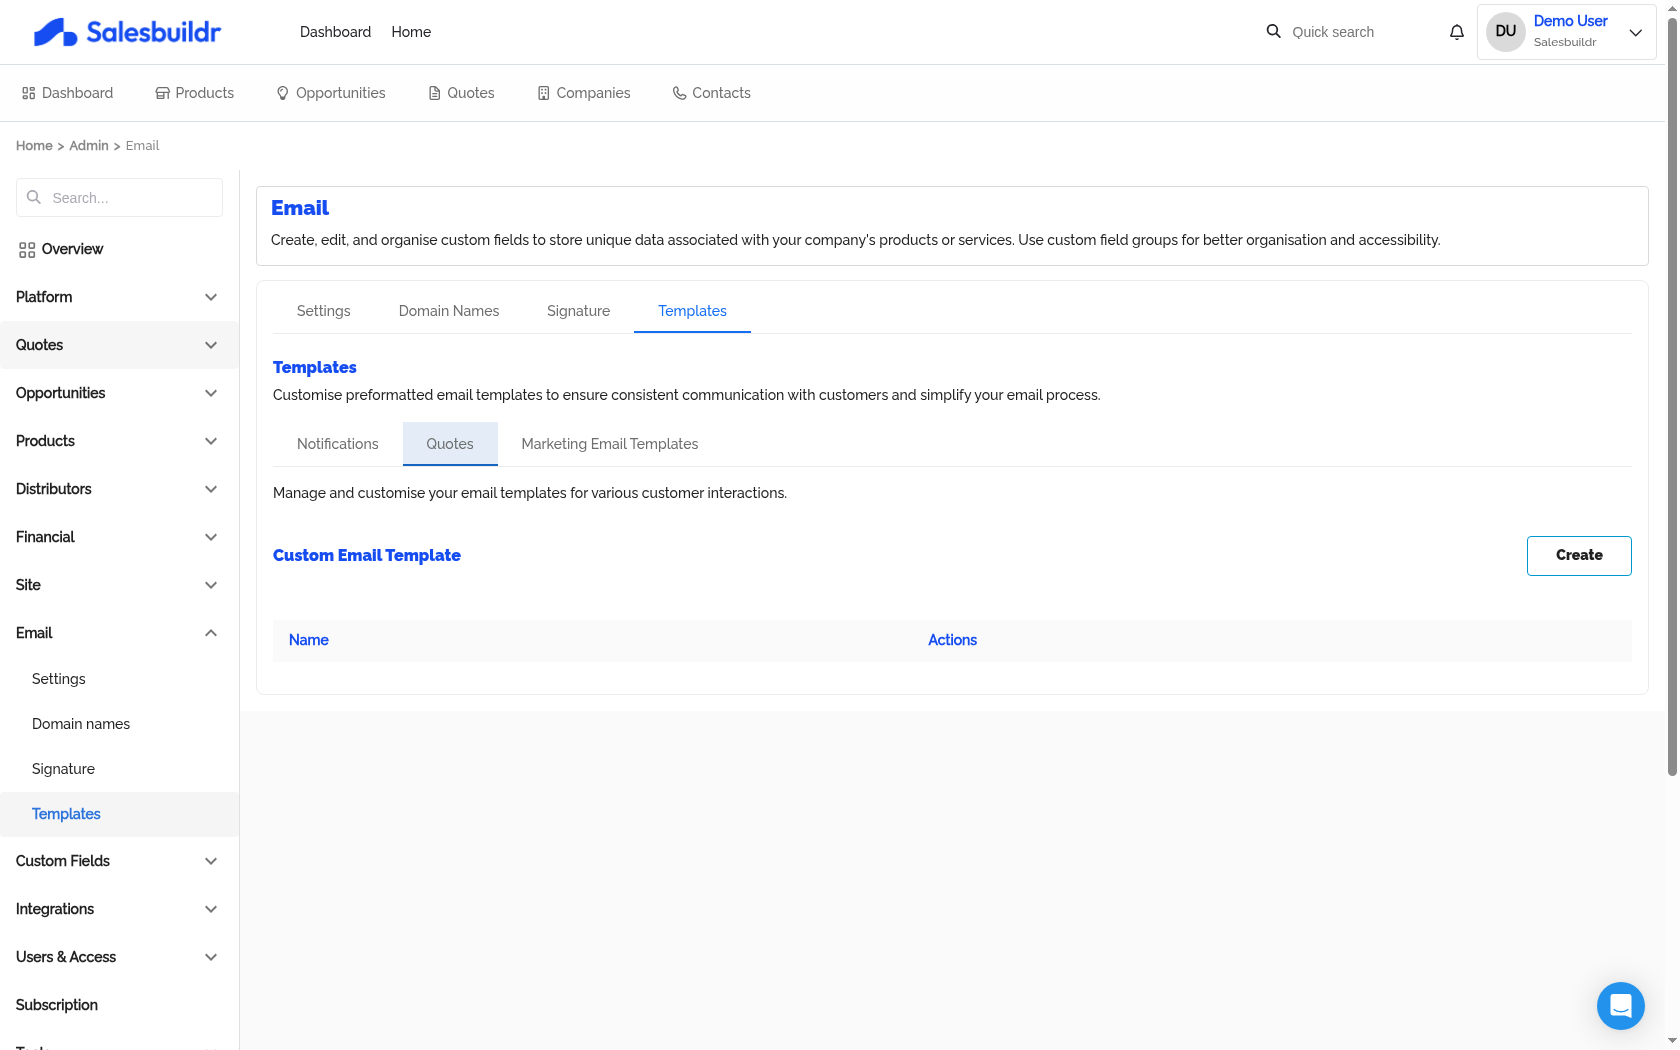
Settings > Email > Templates > Quotes — Mar 1, 2026
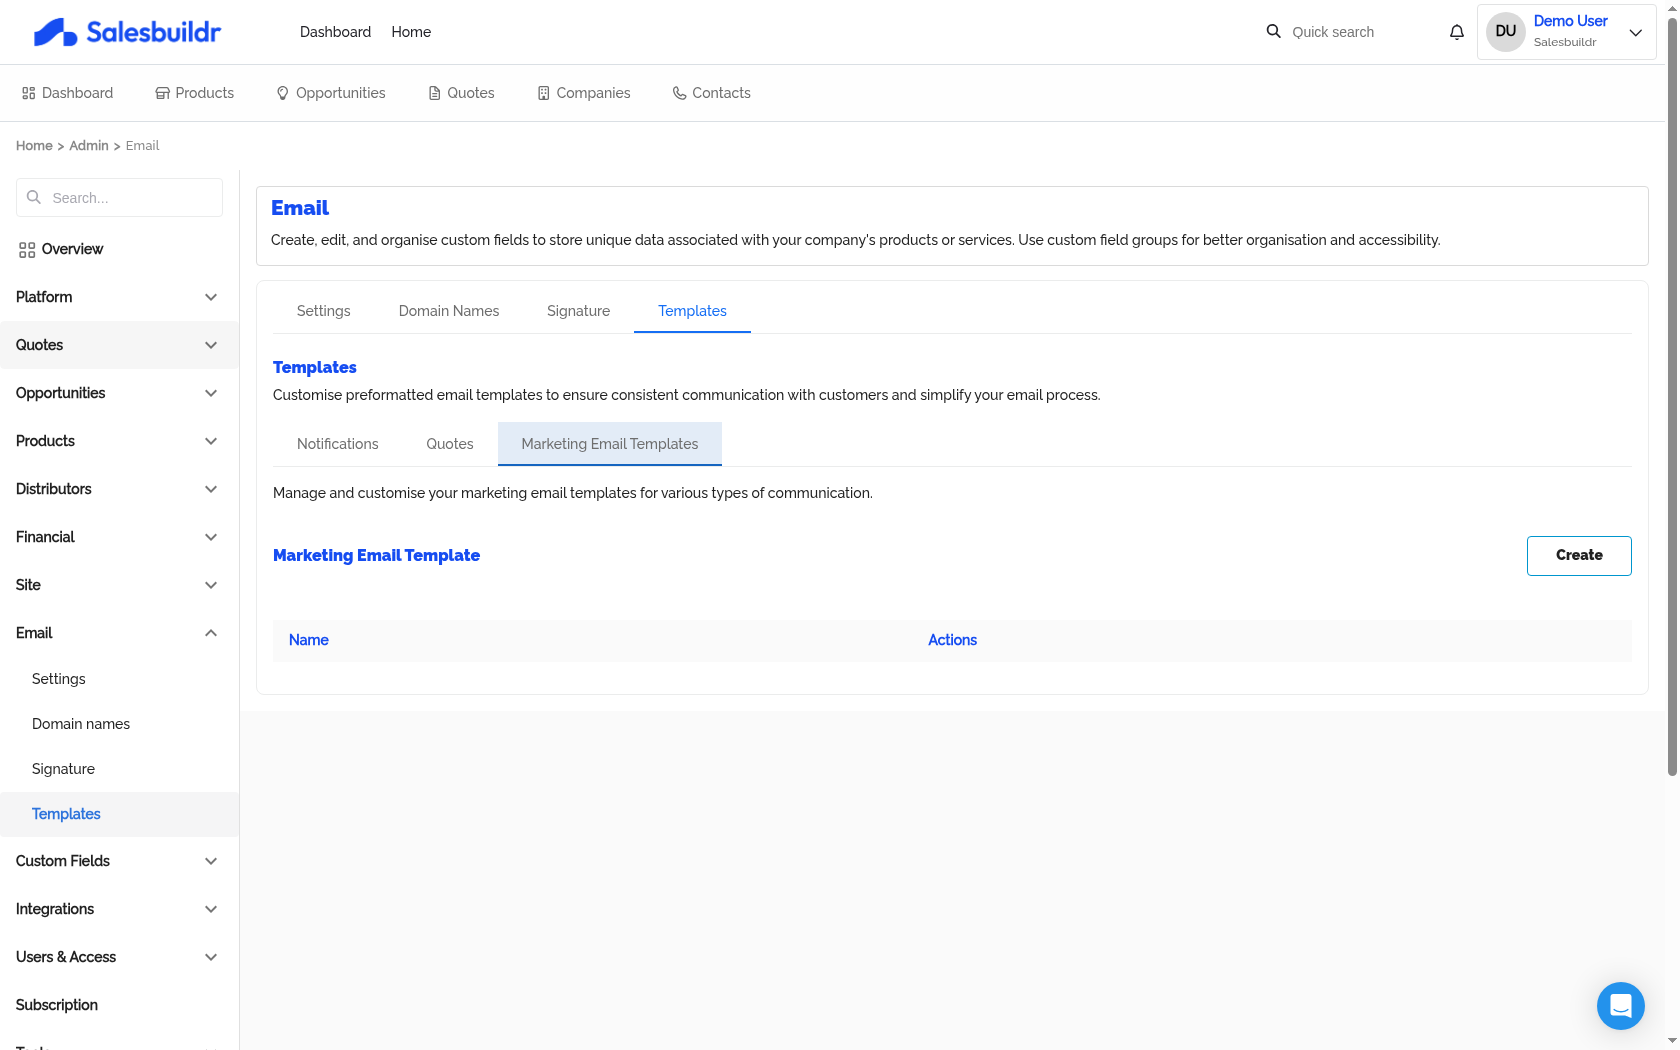
Settings > Email > Templates > Marketing Email Templates — Mar 1, 2026
Manage marketing email templates at Quotes > Marketing Email Templates.
Logging outgoing emails to your HaloPSA opportunity
If you want outgoing Salesbuildr emails (quote sends, approval requests, etc.) to appear on the linked opportunity in HaloPSA, you can use HaloPSA's inbound mailbox logging feature.
How it works: HaloPSA monitors a configured inbound mailbox and threads any incoming email onto the matching opportunity when the email subject contains a reference tag in the format ##[ID]##, where [ID] is the HaloPSA opportunity ID.
Setup in Salesbuildr:
Find your HaloPSA inbound mailbox address in HaloPSA under Configuration > Email > Mailbox Setup.
In Salesbuildr, go to Settings > Email > Templates and open the relevant template (e.g. the approval request).
In the BCC field, enter your HaloPSA inbound mailbox address.
In the Subject field, append the following at the end of your subject line:
##{{quote.opportunity.externalIdentifier}}##
This will automatically tag each outgoing email with the correct opportunity ID, and HaloPSA will log it against the right record.
Note: This requires a HaloPSA inbound mailbox to be set up and actively monitored. The subject tag format (##[ID]##) is the default HaloPSA pattern — verify this matches your instance's configuration if emails are not logging as expected.
Template variables (merge fields)
All email templates, cover pages, and content widgets support Handlebars merge fields. Click the variables panel in the editor to browse available fields and click to insert.
Available variable categories:
Handlebars helpers:
Conditional:
{{#if quote.total.month}}...{{/if}}If/else:
{{#if user}}{{user.fullName}}{{else}}an anonymous user{{/if}}Iteration:
{{#each quote.items}}<li>{{quantity}}x {{title}}</li>{{/each}}Date formatting:
{{date fieldName "format"}}
See also
Email & Notifications — FAQ & Troubleshooting
Quotes — Settings
HTML content, variables, languages, and starter templates — Quotes
Cover Pages — Quotes
After Onboarding — Getting Started
Multi-Entity & Currency — Quotes
Was this helpful?
Still need help? Ask the team